
How to create tags?
- Knowledge base
- Features
- Tags
- How to create tags?
Tags are created and configured in Settings > Tags and requests.

If you plan to use tags to mark clients and requests, you must enable them:

Then you need to configure the groups of tags. The groups are necessary for convenient sorting of tags and sharing access to different groups.
To create a group:
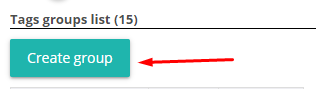
- Go to section Tags groups list > Create group.
- Enter a group name, then select OK.
After you create a group, the group appears in the list.
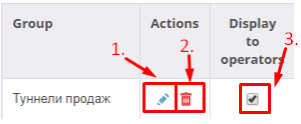
1 - Change the group name (be sure to confirm the change);
2 - Delete group;
3 - Operators access to this tag group.
After the group is created, you can start creating tags:
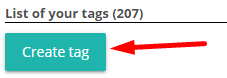
1. Select List of your tags > Create tag.
2. Fill in all the fields:
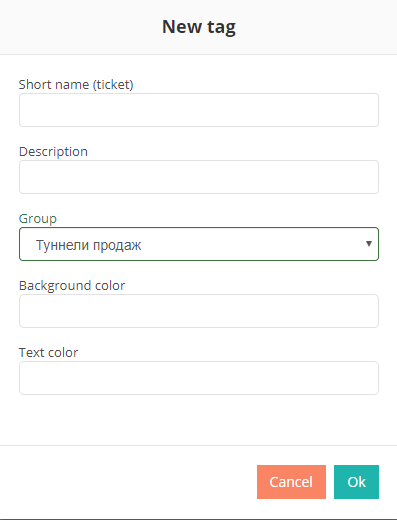
1 - Short name of the tag. This will display the tag in the list.
2 - The detailed description that will be displayed when you place the cursor over a tag.
3 - Affiliation to the tag group. When you search for a tag among others, it will be in the section with the selected group.
4 - The background color of the tag icon.
5 - The color of the short name of the tag that will be visible on the tag icon.
Once a tag is created, it will appear in the list:

1 - Editing of the tag. You can change all the data as when creating a tag. Do not forget to confirm your changes by clicking on the green checkmark.
2 - Deleting a tag.


